
はじめに
みなさん、Flutterはお使いでしょうか?
ここのところ特に人気になりつつあるGoogle製のクロスプラットフォーム向けフレームワークです。
■過去5年間の「Flutter」の人気度(Googleトレンドより)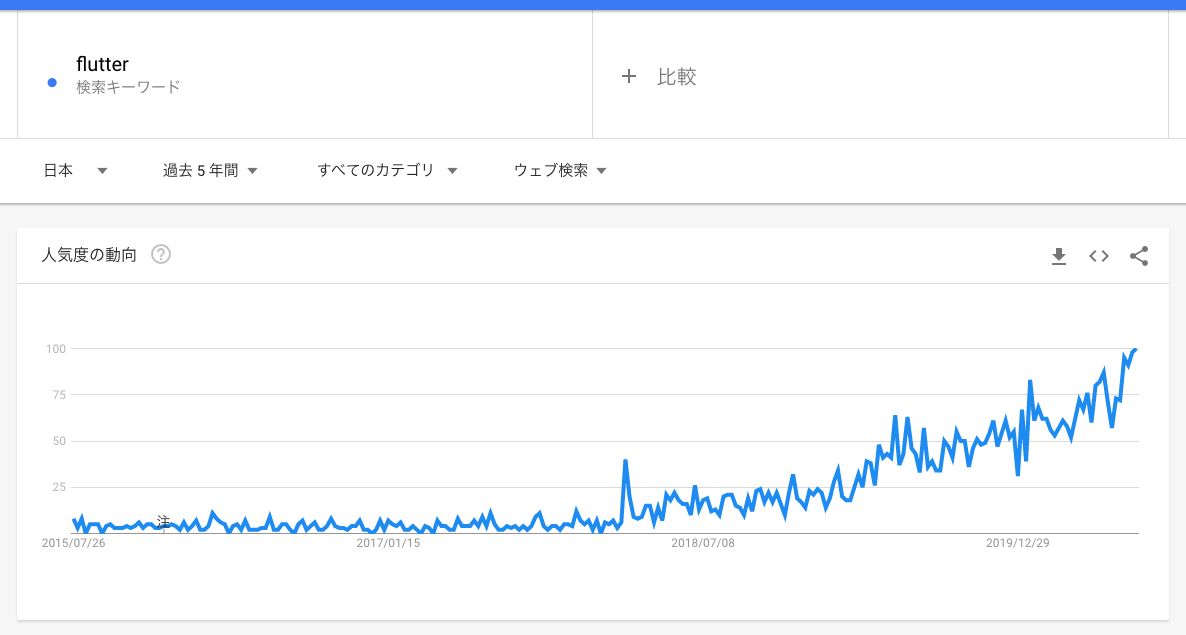
Flutterを使えば主にiOS / AndroidアプリをFlutterひとつで簡単に作成できます。
(同様のフレームワークにはReact NativeやXamarinなどもありますね)
今回はそんなFlutterとmicroCMSを組み合わせ、簡単なメディアアプリを作っていきます。
ーーーーーーーー
microCMSは日本製ヘッドレスCMSです。
APIベースであることからプラットフォームを一切問わずに使えるCMSです。
開発者視点ではFlutterのような新しい技術やネイティブ(SwiftやKotlin)からも簡単に扱え、編集者視点ではわかりやすい入稿画面で業務を進められることから様々なサイトやアプリにてご利用いただいております。
https://microcms.io/
ーーーーーーーー
microCMSの準備
それではさっそく進めていきましょう。
まずはmicroCMSを準備していきます。
今回はシンプルな「記事」というAPIを準備します。
(はじめてmicroCMSをお使いになる方は microCMSのはじめ方 などもご参照ください)
まずはエンドポイントを指定します。今回はarticlesとしました。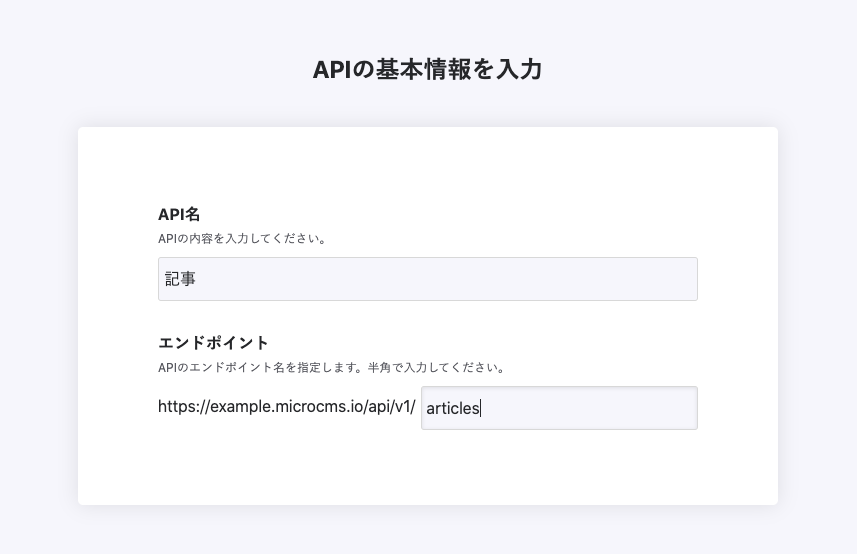
次に、記事は複数作成するので「リスト形式」を選択します。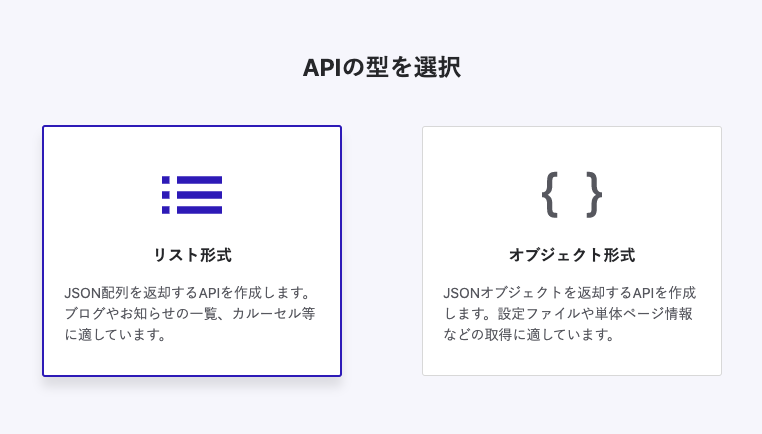
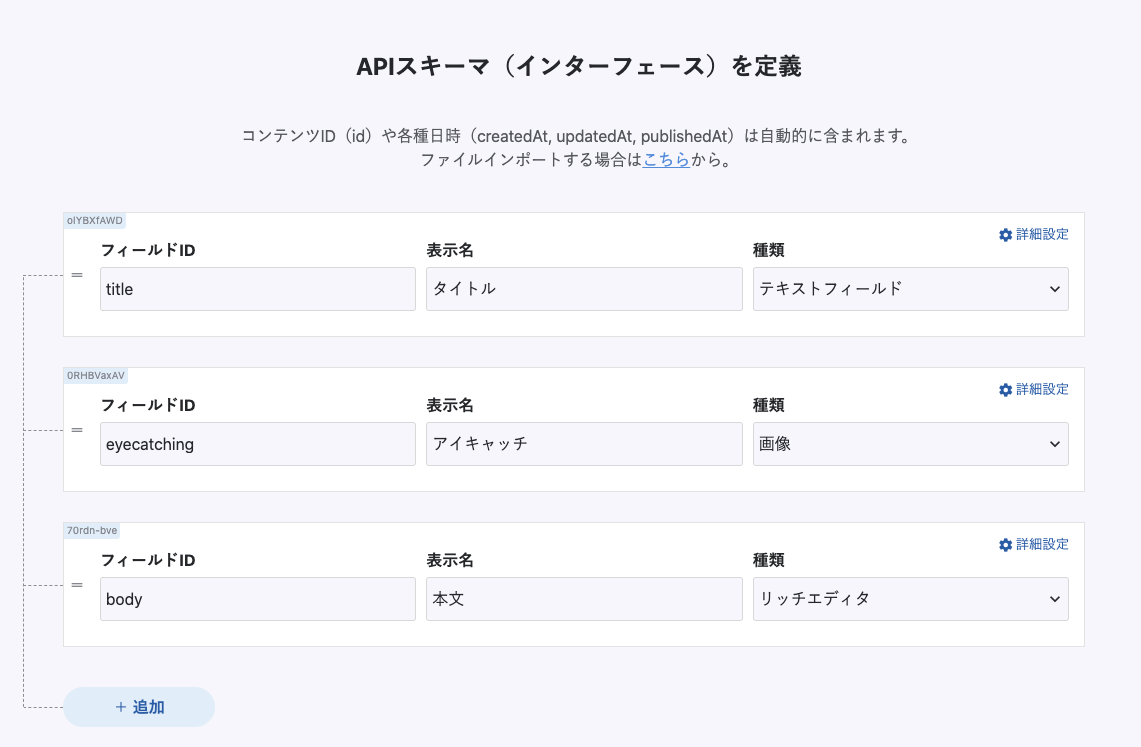
最後にスキーマです。
今回は以下の3つのフィールドを設定します。
- タイトルテキスト
- アイキャッチ画像
- 本文
これでAPIの作成は完了です。
記事もいくつか作成しておきましょう。
■記事の一覧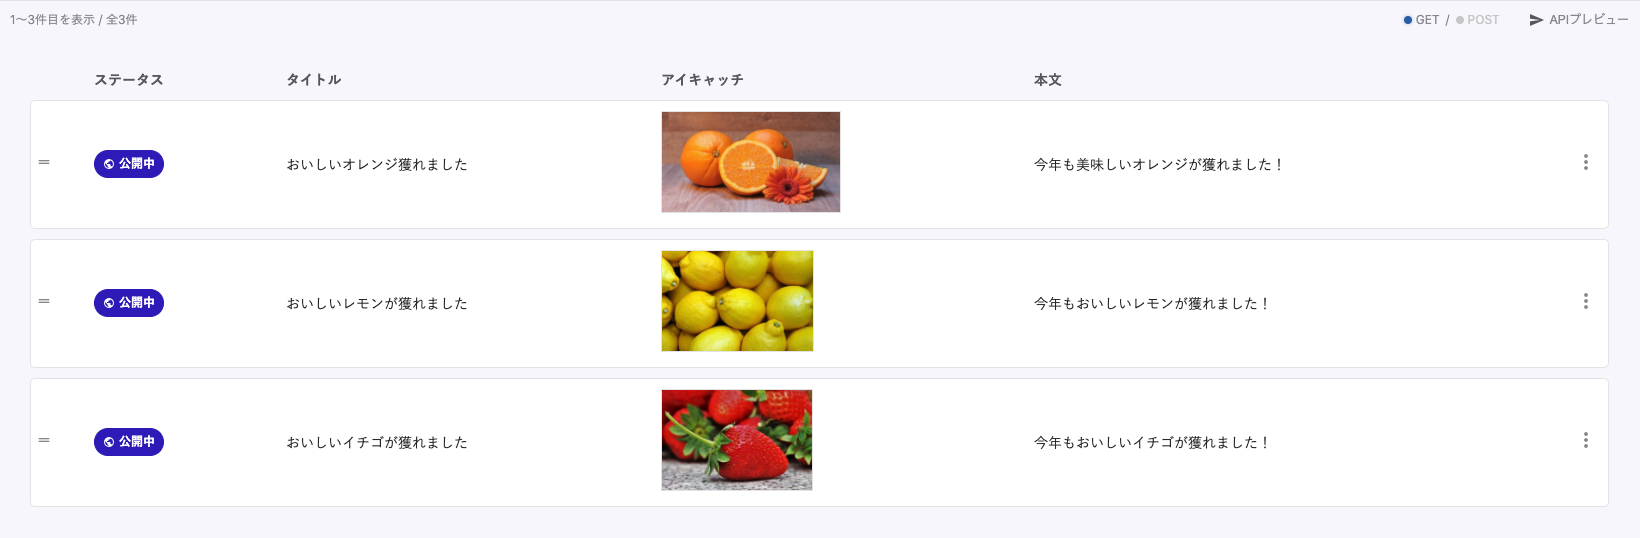
■記事の詳細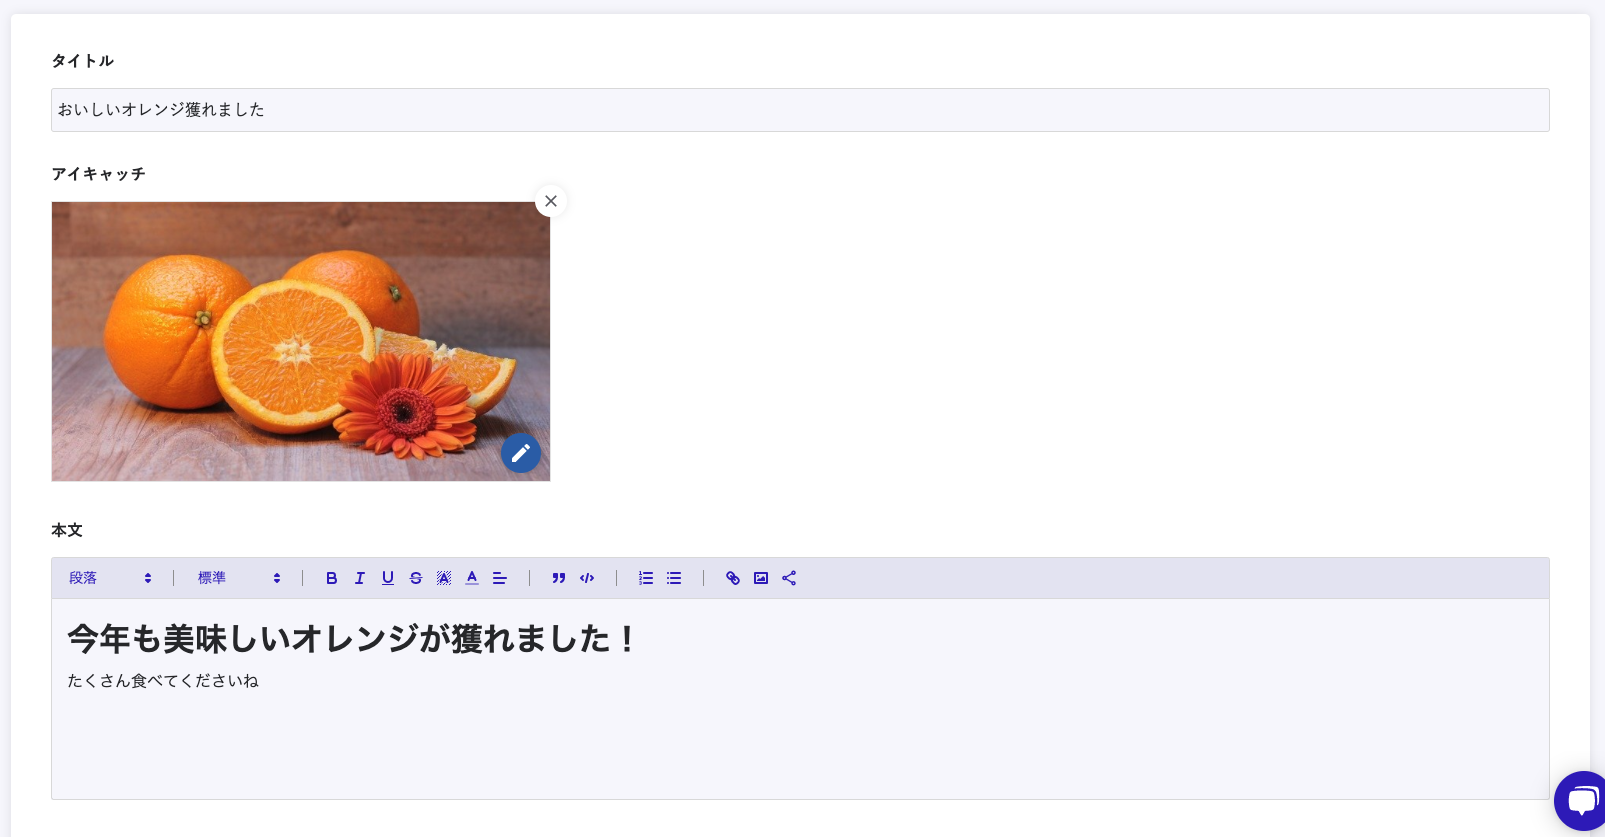
この記事では以下のHTTPリクエストでこれらの入稿内容を取得できる前提で進めていきます。(実際に叩けます)
$ curl "https://example.microcms.io/api/v1/articles" -H "X-MICROCMS-API-KEY: dc59f358-4622-471f-8d1e-6c7a6f969558"Flutterプロジェクトの実装
それではアプリ側の実装に進みましょう。
今回は一覧画面と詳細画面のみからなる簡易的なメディアアプリを開発します。
表示するコンテンツには先ほど準備したmicroCMSから取得したものを使います。
それでは進めましょう。まずはプロジェクトの作成からです。
プロジェクト作成
Flutterの環境構築など最初の設定はFlutterのGet Startedをご参照ください。
今回はAndroid Studioを使って開発を進めます。
最初に「Start a new Flutter project」を選び、Flutterプロジェクトを作成します。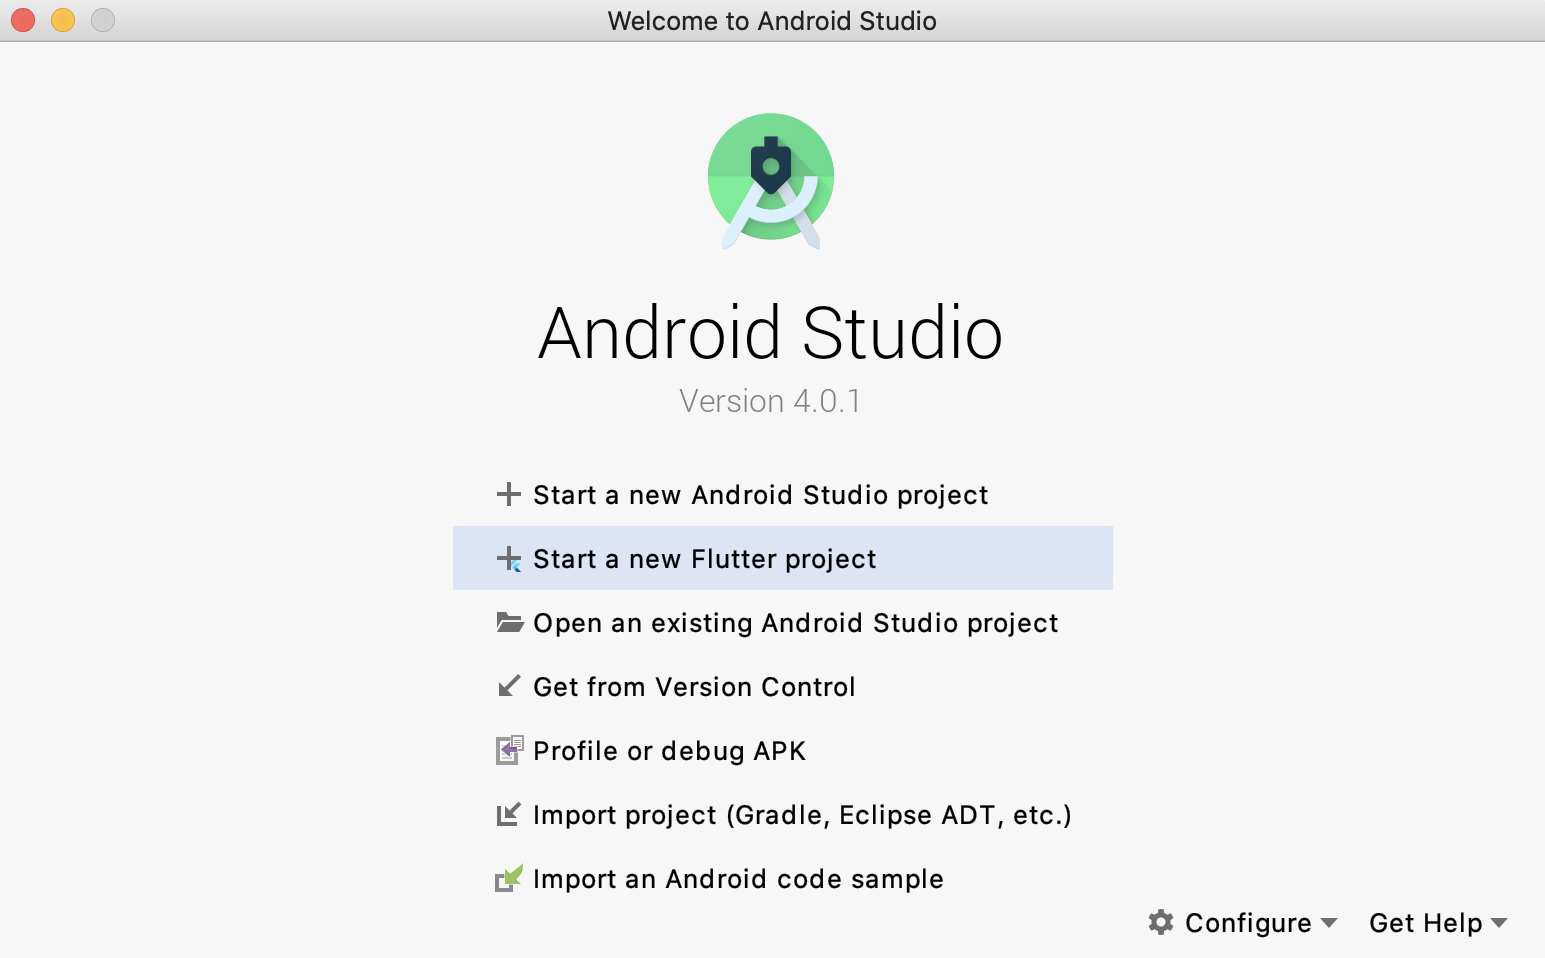
プロジェクト名は「simple_media_sample」など、自由につけていただいて構いません。
プロジェクトを作成するとlib/main.dartにある程度のコードが記載されています。
まずは簡単のため、一旦こちらの中身を以下のようなHello Worldだけを表示する形に変えておきましょう。
(https://flutter.dev/docs/get-started/codelab の内容をそのまま持ってきました)
lib/main.dart
import 'package:flutter/material.dart';

void main() => runApp(MyApp());

class MyApp extends StatelessWidget {
  @override
  Widget build(BuildContext context) {
    return MaterialApp(
      title: 'Welcome to Flutter',
      home: Scaffold(
        appBar: AppBar(
          title: Text('Welcome to Flutter'),
        ),
        body: Center(
          child: Text('Hello World'),
        ),
      ),
    );
  }
}
これで実行すると、以下のような表示となるでしょう。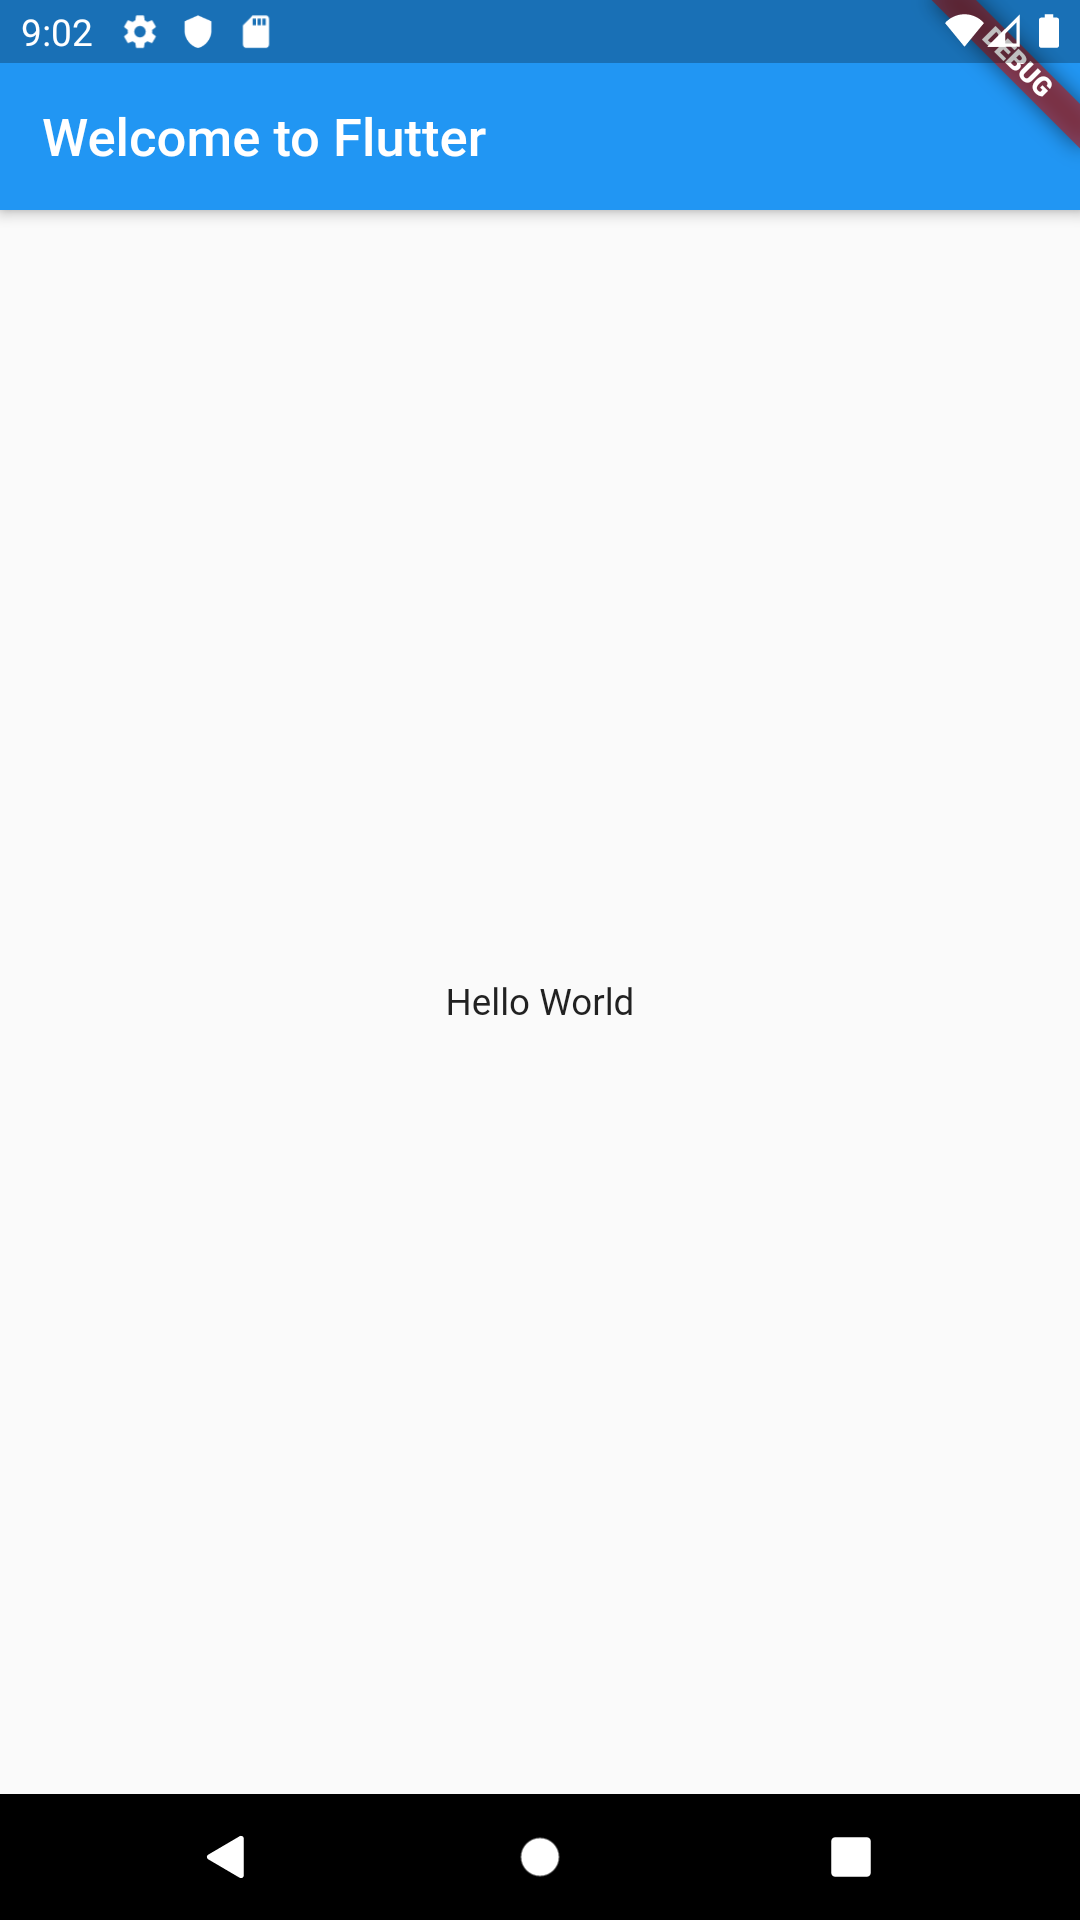
一覧画面の作成
それではメディアアプリのトップ画面である一覧画面を作っていきましょう。
まずはmicroCMSのコンテンツAPIより記事一覧データを取得する部分です。
記事はHTTP経由で取得できるため、まずはその準備を行います。
今回はHTTPリクエストのためにhttpパッケージを利用します。
■pubspec.yaml
dependencies:
  flutter:
    sdk: flutter
  http: ^0.12.2 # この行を追加。バージョンは適宜確認してください。
追加できたらパッケージを取得します。
$ flutter pub get取得後はpubspec.lockにhttpパッケージの内容も記載されるのでご確認ください。
準備が整ったのでmicroCMSからのデータ取得に進みましょう。
まずは新たにリスト用のStatefulWidgetを作成します。
今回はMyAppListというクラス名で作成しました。
■lib/dart.main
class MyAppList extends StatefulWidget {
  @override
  _MyAppListState createState() => _MyAppListState();
}

class _MyAppListState extends State<MyAppList> {
  @override
  Widget build(BuildContext context) {
    return Scaffold(
      appBar: AppBar(
        title: Text('Welcome to Flutter'),
      ),
      body: Center(
        child: Text('Hello World!'),
      ),
    );
  }
}
MyAppの実装も修正します。
class MyApp extends StatelessWidget {
  @override
  Widget build(BuildContext context) {
    return MaterialApp(
      title: 'Welcome to Flutter',
      home: MyAppList() //作成したMyAppListを使用する
    );
  }
}
Stateの準備ができました。
次に一覧画面で使用するデータ型を用意します。ListItemというクラス名で新たに定義します。
class ListItem {
  final String id;
  final String title;
  final DateTime publishedAt;
  final Uri eyecathing;

  ListItem.fromJSON(Map<String, dynamic> json)
    : id = json['id'],
        title = json['title'],
        publishedAt = DateTime.parse(json['publishedAt']),
        eyecathing = Uri.parse(json['eyecatching']['url']);
}
次にいよいよmicroCMSに対してHTTPリクエストを行い、コンテンツを取得します。
_MyAppListStateにコンテンツ取得用の_loadListItemや、ライフサイクルメソッドであるinitStateを実装します。
class _MyAppListState extends State<MyAppList> {
  final _listItems = <ListItem>[];

  void _loadListItem() async {
    final result = await http.get(
        'https://example.microcms.io/api/v1/articles?fields=id,publishedAt,title,eyecatching',
        headers: {
          "X-MICROCMS-API-KEY": 'dc59f358-4622-471f-8d1e-6c7a6f969558'
        });
    List contents = json.decode(result.body)['contents'];
    _listItems.clear();
    _listItems.addAll(contents.map((content) => ListItem.fromJSON(content)));
  }

  @override
  void didUpdateWidget(MyAppList oldWidget) {
    super.didUpdateWidget(oldWidget);
    _loadListItem();
  }

  //...buildメソッド
}
(今回は簡単のためAPIキーやエンドポイントをそのまま記載していますが、必要に応じてサーバサイドを噛ませたり難読化するなどの対応をしてください)
これでデータの取得ができました。
あとはこのデータをリスト表示をすれば完成です。ここではCardとListTileなどを使ってレイアウトしていきます。
なお、画像の非同期取得やページングなどの厳密な調整はここでは行っていません。
実際のプロジェクトではこの辺りも注意して進めてください。
@override
Widget build(BuildContext context) {
  return Scaffold(
    appBar: AppBar(
      title: Text('記事一覧'),
    ),
    body: ListView(
      children: _listItems.map((listItem) =>
        Card(
          child: ListTile(
            leading: ConstrainedBox(
              constraints: BoxConstraints(),
              child: Image.network("${listItem.eyecathing.toString()}?w=64&h=64&fit=crop"), //microCMSの画像変更機能を利用
            ),
            title: Text(listItem.title),
            subtitle: Text(listItem.publishedAt.toIso8601String()),
            onTap: () {},
          ),
        )
      ).toList(),
    ),
  );
}
以下のように表示できたら次に進みましょう。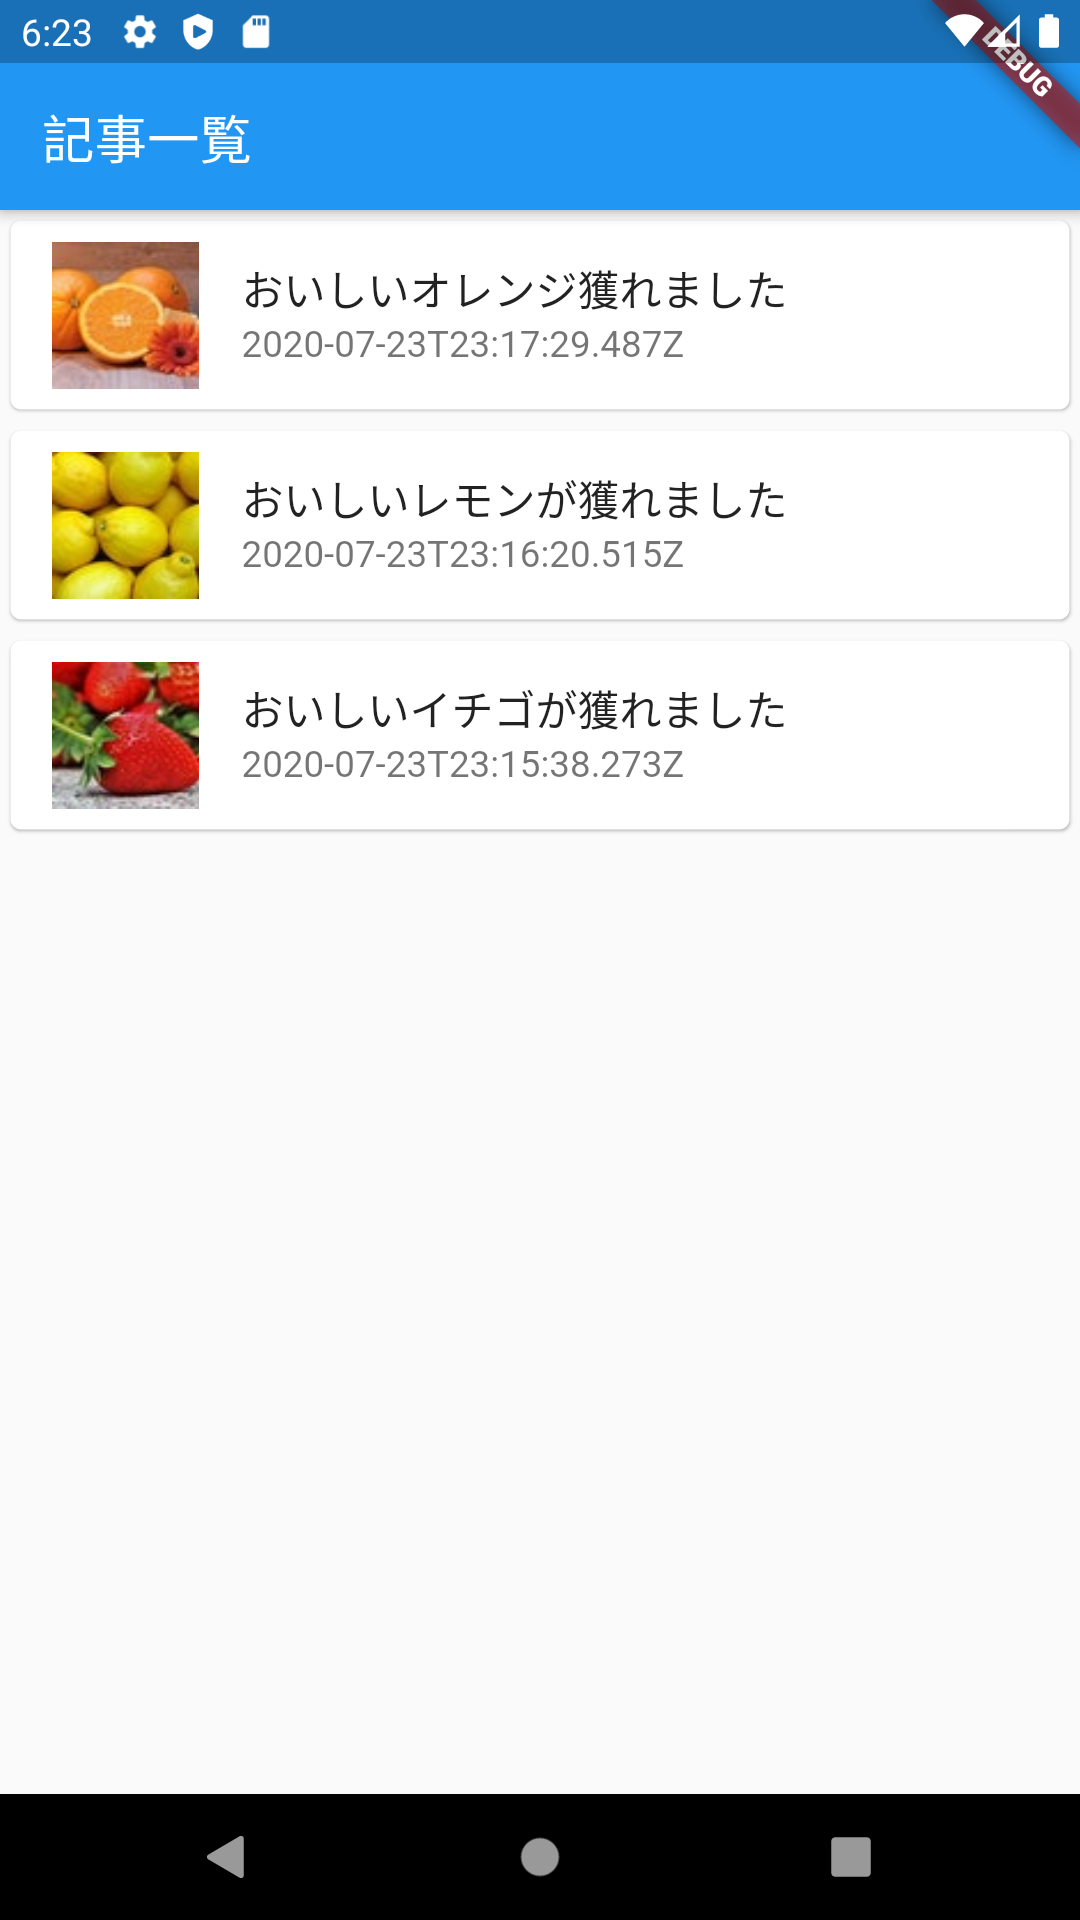
詳細画面の作成
一覧画面を実装できたら詳細画面に進みます。
詳細画面ではidをパラメータとして受け取り、microCMSからコンテンツを取得する形で記事を表示します。
まずは詳細画面のWidgetを作成します。
microCMSのリッチエディタはhtml文字列が返却されるため、webview_flutterパッケージを使って表示をします。
■pubspec.yaml
dependencies:
  flutter:
    sdk: flutter
  http: ^0.12.2
  webview_flutter: ^0.3.22+1 # この行を追加
パッケージをインストールします。
$ flutter pub get
続いて詳細画面を実装します。
■lib/main.dart
import 'package:webview_flutter/webview_flutter.dart';

//詳細画面
class MyAppDetail extends StatefulWidget {
  final String id;

  MyAppDetail({Key key, @required this.id}) : super(key: key);

  @override
  _MyAppDetailState createState() => _MyAppDetailState();
}

class _MyAppDetailState extends State<MyAppDetail> {
  Map<String, dynamic> item;
  WebViewController _controller;

  void _loadDetail(String id) async {
    final result = await http.get(
        'https://example.microcms.io/api/v1/articles/$id',
        headers: {
          "X-MICROCMS-API-KEY": 'dc59f358-4622-471f-8d1e-6c7a6f969558'
        });
    setState(() {
      item = json.decode(result.body);
    });
  }

  @override
  void initState() {
    super.initState();
    _loadDetail(widget.id);
  }

  @override
  Widget build(BuildContext context) {
    return Scaffold(
      appBar: AppBar(
        title: Text('記事詳細'),
      ),
      body: item != null ?
      Column(
        children: [
          Image.network(item['eyecatching']['url']),
          Container(
            decoration: new BoxDecoration(color: Colors.white),
            padding: EdgeInsets.all(16),
            child: Column(
              crossAxisAlignment: CrossAxisAlignment.start,
              children: [
                Text(
                  item['title'],
                  style: TextStyle(fontSize: 24),
                ),
                SizedBox(height: 8),
                ConstrainedBox(
                  constraints: BoxConstraints(maxHeight: 290),
                  child:
                    WebView(
                      initialUrl: 'about:blank',
                      onWebViewCreated: (webViewController) {
                        webViewController.loadUrl(Uri.dataFromString(
                            item['body'],
                            mimeType: 'text/html',
                            encoding: utf8
                        ).toString());
                      },
                    )
                ),
              ],
            ),
          )
        ],
      ) :
      Center(child: Text('読み込み中')) ,
    );
  }
}
残りは一覧画面の要素タップ時に詳細画面を開く実装を追加すれば完了です。
MyAppListのbuildメソッドに追記します。
@override
Widget build(BuildContext context) {
  return Scaffold(
    appBar: AppBar(
      title: Text('記事一覧'),
    ),
    body: ListView(
      children: _listItems.map((listItem) =>
        Card(
          child: ListTile(
            //(いくつかの属性)
            //... ここから追加
            onTap: () {
              Navigator.of(context).push(
                MaterialPageRoute<void>(
                  builder: (BuildContext context) {
                    return MyAppDetail(id: listItem.id);
                  },
                ),
              );
            },
            //... ここまで追加
          ),
        )
      ).toList(),
    ),
  );
}
これで一覧画面のタップ時に詳細画面に遷移して記事を読むことができるようになりました。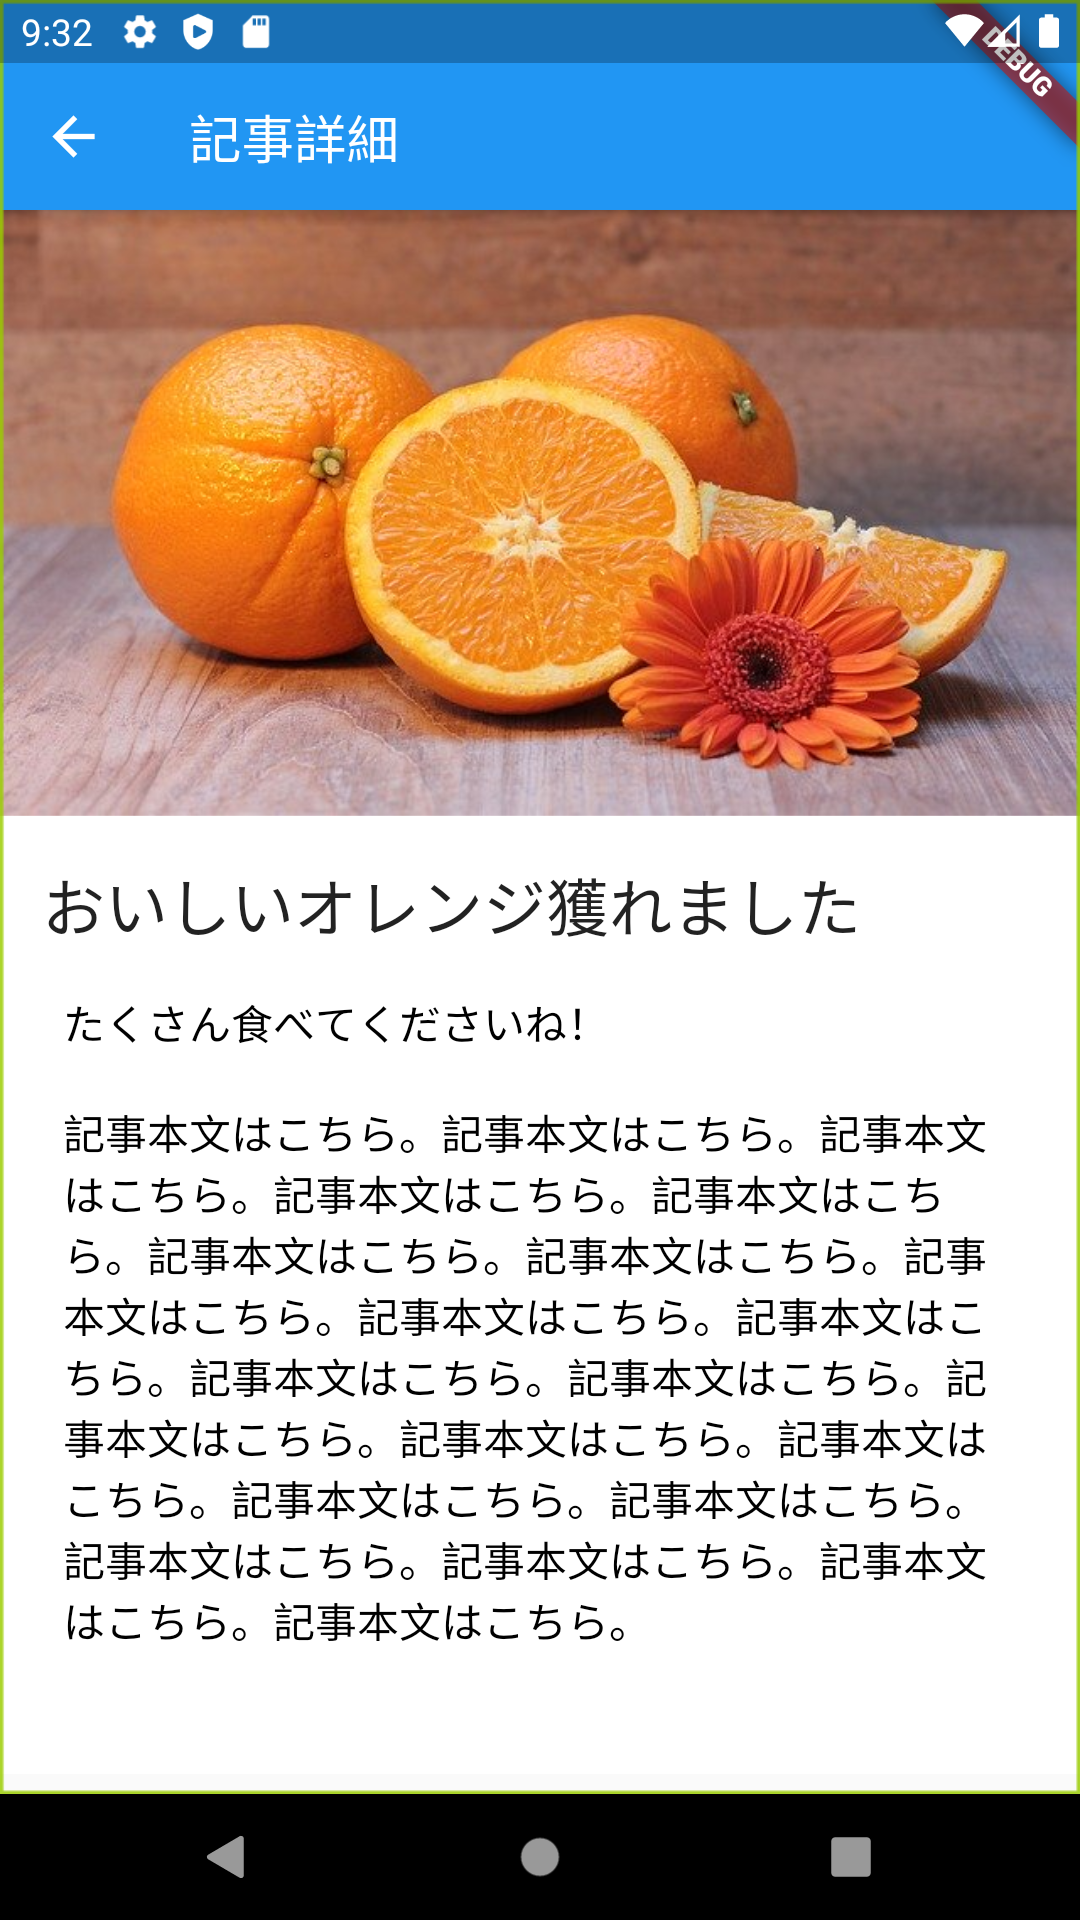
以上で簡単なメディアアプリの実装は完了です。
おわりに
ヘッドレスCMSの特徴であるAPIベースという点はiOSやAndroidなどのアプリにもとても効果的です。
Flutterにさえ慣れていれば今回のような簡単なメディアアプリであれば、1~2時間もあれば開発できてしまうでしょう。
ぜひ皆さんもお試しください!
Appendix: コード全体
今回記述したコードの全体です。
lib/main.dart
import 'dart:convert';

import 'package:flutter/material.dart';
import 'package:http/http.dart' as http;
import 'package:webview_flutter/webview_flutter.dart';

final apiKey = 'dc59f358-4622-471f-8d1e-6c7a6f969558';
final endpoint = 'https://example.microcms.io/api/v1/articles';

void main() => runApp(MyApp());

class MyApp extends StatelessWidget {
  @override
  Widget build(BuildContext context) {
    return MaterialApp(
      title: 'Welcome to Flutter',
      home: MyAppList()
    );
  }
}

class MyAppList extends StatefulWidget {
  @override
  _MyAppListState createState() => _MyAppListState();
}

//記事一覧
class _MyAppListState extends State<MyAppList> {
  final _listItems = <ListItem>[];

  void _loadListItem() async {
    final result = await http.get(
        '$endpoint?fields=id,publishedAt,title,eyecatching',
        headers: { "X-MICROCMS-API-KEY": apiKey }
    );
    List contents = json.decode(result.body)['contents'];
    _listItems.clear();
    _listItems.addAll(contents.map((content) => ListItem.fromJSON(content)));
  }

  @override
  void didUpdateWidget(MyAppList oldWidget) {
    super.didUpdateWidget(oldWidget);
    _loadListItem();
  }

  @override
  void initState() {
    super.initState();
    _loadListItem();
  }

  @override
  Widget build(BuildContext context) {
    return Scaffold(
      appBar: AppBar(
        title: Text('記事一覧'),
      ),
      body: ListView(
        children: _listItems.map((listItem) =>
          Card(
            child: ListTile(
              leading: ConstrainedBox(
                constraints: BoxConstraints(),
                child: Image.network("${listItem.eyecathing.toString()}?w=64&h=64&fit=crop"), //microCMSの画像変更機能を利用
              ),
              title: Text(listItem.title),
              subtitle: Text(listItem.publishedAt.toIso8601String()),
              onTap: () {
                Navigator.of(context).push(
                  MaterialPageRoute<void>(
                    builder: (BuildContext context) {
                      return MyAppDetail(id: listItem.id);
                    },
                  ),
                );
                },
            ),
          )
        ).toList(),
      ),
    );
  }
}

//リスト用データクラス
class ListItem {
  final String id;
  final String title;
  final DateTime publishedAt;
  final Uri eyecathing;

  ListItem.fromJSON(Map<String, dynamic> json)
    : id = json['id'],
        title = json['title'],
        publishedAt = DateTime.parse(json['publishedAt']),
        eyecathing = Uri.parse(json['eyecatching']['url']);
}

//詳細画面
class MyAppDetail extends StatefulWidget {
  final String id;

  MyAppDetail({Key key, @required this.id}) : super(key: key);

  @override
  _MyAppDetailState createState() => _MyAppDetailState();
}

class _MyAppDetailState extends State<MyAppDetail> {
  Map<String, dynamic> item;
  WebViewController _controller;

  void _loadDetail(String id) async {
    final result = await http.get(
        '$endpoint/$id',
        headers: { "X-API-KEY": apiKey }
    );
    setState(() {
      item = json.decode(result.body);
    });
  }

  @override
  void initState() {
    super.initState();
    _loadDetail(widget.id);
  }

  @override
  Widget build(BuildContext context) {
    return Scaffold(
      appBar: AppBar(
        title: Text('記事詳細'),
      ),
      body: item != null ?
      Column(
        children: [
          Image.network(item['eyecatching']['url']),
          Container(
            decoration: new BoxDecoration(color: Colors.white),
            padding: EdgeInsets.all(16),
            child: Column(
              crossAxisAlignment: CrossAxisAlignment.start,
              children: [
                Text(
                  item['title'],
                  style: TextStyle(fontSize: 24),
                ),
                SizedBox(height: 8),
                ConstrainedBox(
                  constraints: BoxConstraints(maxHeight: 290),
                  child:
                    WebView(
                      initialUrl: 'about:blank',
                      onWebViewCreated: (webViewController) {
                        webViewController.loadUrl(Uri.dataFromString(
                            item['body'],
                            mimeType: 'text/html',
                            encoding: utf8
                        ).toString());
                      },
                    )
                ),
              ],
            ),
          )
        ],
      ) :
      Center(child: Text('読み込み中')) ,
    );
  }
}
pubspec.yml
name: simple_media_sample
description: A new Flutter application.

# The following line prevents the package from being accidentally published to
# pub.dev using `pub publish`. This is preferred for private packages.
publish_to: 'none' # Remove this line if you wish to publish to pub.dev

# The following defines the version and build number for your application.
# A version number is three numbers separated by dots, like 1.2.43
# followed by an optional build number separated by a +.
# Both the version and the builder number may be overridden in flutter
# build by specifying --build-name and --build-number, respectively.
# In Android, build-name is used as versionName while build-number used as versionCode.
# Read more about Android versioning at https://developer.android.com/studio/publish/versioning
# In iOS, build-name is used as CFBundleShortVersionString while build-number used as CFBundleVersion.
# Read more about iOS versioning at
# https://developer.apple.com/library/archive/documentation/General/Reference/InfoPlistKeyReference/Articles/CoreFoundationKeys.html
version: 1.0.0+1

environment:
  sdk: ">=2.7.0 <3.0.0"

dependencies:
  flutter:
    sdk: flutter
  http: ^0.12.2
  webview_flutter: ^0.3.22+1


  # The following adds the Cupertino Icons font to your application.
  # Use with the CupertinoIcons class for iOS style icons.
  cupertino_icons: ^0.1.3

dev_dependencies:
  flutter_test:
    sdk: flutter

# For information on the generic Dart part of this file, see the
# following page: https://dart.dev/tools/pub/pubspec

# The following section is specific to Flutter.
flutter:

  # The following line ensures that the Material Icons font is
  # included with your application, so that you can use the icons in
  # the material Icons class.
  uses-material-design: true

  # To add assets to your application, add an assets section, like this:
  # assets:
  #   - images/a_dot_burr.jpeg
  #   - images/a_dot_ham.jpeg

  # An image asset can refer to one or more resolution-specific "variants", see
  # https://flutter.dev/assets-and-images/#resolution-aware.

  # For details regarding adding assets from package dependencies, see
  # https://flutter.dev/assets-and-images/#from-packages

  # To add custom fonts to your application, add a fonts section here,
  # in this "flutter" section. Each entry in this list should have a
  # "family" key with the font family name, and a "fonts" key with a
  # list giving the asset and other descriptors for the font. For
  # example:
  # fonts:
  #   - family: Schyler
  #     fonts:
  #       - asset: fonts/Schyler-Regular.ttf
  #       - asset: fonts/Schyler-Italic.ttf
  #         style: italic
  #   - family: Trajan Pro
  #     fonts:
  #       - asset: fonts/TrajanPro.ttf
  #       - asset: fonts/TrajanPro_Bold.ttf
  #         weight: 700
  #
  # For details regarding fonts from package dependencies,
  # see https://flutter.dev/custom-fonts/#from-packages

